Standard Operating Procedure (SOP)
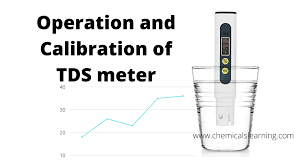
Here’s a sample Standard Operating Procedure (SOP) for the Calibration of a Conductivity/TDS Meter. This version follows general lab standards and can be adapted based on the specific make and model of your instrument, as well as any internal quality procedures.
1. Purpose
To provide a standardized procedure for the calibration of the Conductivity/TDS Meter to ensure accurate and reliable measurements.
2. Scope
This SOP applies to all laboratory personnel using the Conductivity/TDS Meter in [Department/Lab Name].
3. Responsibilities
-
Lab Technician/Analyst: Responsible for performing the calibration.
-
Lab Supervisor: Responsible for verifying and ensuring the calibration is performed as per SOP.
4. Equipment & Materials
-
Conductivity/TDS Meter (Model: [Insert Model])
-
Certified conductivity calibration standards (e.g., 84 µS/cm, 1413 µS/cm, 12.88 mS/cm)
-
Distilled or deionized water
-
Clean beakers (preferably glass or plastic)
-
Lint-free tissue or clean cloth
-
Timer or stopwatch
5. Safety Precautions
-
Wear appropriate personal protective equipment (PPE).
-
Handle calibration standards carefully.
-
Avoid touching the electrode with bare hands to prevent contamination.
6. Procedure
6.1 Pre-calibration Checks
-
Ensure the meter is clean and free from visible damage.
-
Power on the instrument and allow it to warm up as per the manufacturer’s instructions (typically 5–15 minutes).
-
Rinse the electrode/probe with distilled water and blot dry with a lint-free tissue.
6.2 Calibration
-
Select the Calibration Mode
-
Press the “Cal” or “Calibration” button on the meter.
-
-
Use the First Standard Solution
-
Pour a small amount of the first conductivity standard into a clean beaker.
-
Immerse the probe into the solution without touching the sides or bottom of the beaker.
-
Wait for the reading to stabilize (as per meter instructions, typically 30–60 seconds).
-
Press “Enter” or “Confirm” to save the calibration point.
-
-
Rinse and Dry
-
Rinse the probe with distilled water and blot dry.
-
-
Repeat with Additional Standard(s)
-
If doing multi-point calibration (recommended for accuracy), repeat the above steps with higher or lower value standards.
-
-
Finalize Calibration
-
Exit calibration mode.
-
Check the meter’s display to ensure it reads correctly for a known standard.
-
7. Post-Calibration
-
Record the calibration details in the logbook:
-
Date
-
Time
-
Standards used
-
Readings obtained
-
Operator initials
-
-
Label the meter with “Calibrated” status and the date of calibration.
8. Frequency of Calibration
-
Daily before use, or
-
Before critical measurements, or
-
As per manufacturer’s recommendations
9. Troubleshooting
| Issue | Possible Cause | Solution |
|---|---|---|
| Unstable reading | Dirty electrode | Clean and rinse electrode |
| Reading drift | Expired standards | Use fresh standards |
| No response | Faulty probe | Replace probe or check connections |
10. References
-
Manufacturer’s User Manual
-
ISO 17025 Guidelines
-
Internal Quality Manual
🎓 Discover one of the best Quality Assurance courses available — click below to explore the course that’s shaping future QA skills.
https://trcjw.on-app.in/app/oc/306166/trcjw


