How do you calibrate a Vernier Caliper?

Calibrating a Vernier caliper is essential to ensure its accuracy before taking measurements. Here’s a detailed step-by-step guide on how to calibrate a Vernier caliper:
1. Clean the Caliper
-
Before starting the calibration process, clean both the main scale and the Vernier scale to remove any dust, dirt, or oil. Use a soft cloth or a lint-free tissue. Ensure the caliper’s measuring surfaces are free from any debris that could affect the accuracy.
2. Close the Caliper
-
Gently close the caliper by bringing the measuring jaws together, making sure they touch each other. The zero on the Vernier scale should align precisely with the zero on the main scale.
-
If they do not align perfectly, note the discrepancy.
3. Check Zero Reading
-
When the caliper is fully closed, the zero mark on the Vernier scale should coincide with the zero mark on the main scale.
-
If they align: The caliper is calibrated, and you can proceed to use it.
-
If they don’t align: A correction needs to be made. This misalignment is called a zero error.
4. Measure and Record Zero Error
-
If there is a zero error, you will need to adjust the readings. Zero error occurs if:
-
The zero of the Vernier scale is ahead of or behind the zero of the main scale.
-
-
Note the amount of zero error by reading the difference between the two zeros.
For example:
-
If the zero on the Vernier scale is ahead of the main scale’s zero, it’s a positive zero error.
-
If the zero on the Vernier scale is behind the main scale’s zero, it’s a negative zero error.
-
5. Adjust Zero Error
-
Some Vernier calipers have a screw or adjustment knob to correct zero error. If your caliper has this feature:
-
Use the screw to shift the Vernier scale until its zero mark aligns with the zero on the main scale.
-
-
If there’s no adjustment feature:
-
Simply make a note of the zero error and account for it when taking measurements. For example, if the zero error is +0.02 mm, you would subtract 0.02 mm from all your readings.
-
6. Check at Known Dimensions
-
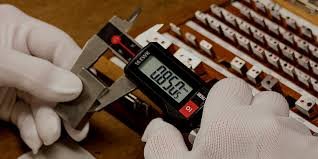
To further verify the calibration, measure objects with known dimensions, like a gauge block or a precision standard, and check the readings. For example, if you have a 10 mm gauge block, the caliper should read 10.00 mm. This will confirm that the calibration is correct and that there is no further error in the measuring mechanism.
7. Measure Again
-
After confirming zero alignment, measure the known objects and check if the measurements match the actual size.
8. Record and Maintain Calibration Logs
-
If you regularly calibrate your Vernier caliper, keep a calibration log to track any drift or changes in accuracy over time. This will help identify whether the caliper needs to be recalibrated or if any parts are wearing out.
9. Final Check for Calibration
-
Once everything seems accurate, perform a final check by measuring a few more known objects or by comparing with another calibrated caliper if possible.
Summary of Steps:
-
Clean the caliper.
-
Close the caliper and check zero alignment.
-
Measure and record zero error (if any).
-
Adjust zero error or note it for correction.
-
Verify calibration using objects of known size.
-
Keep track of calibration status over time.
By regularly calibrating your Vernier caliper, you ensure that your measurements remain accurate and reliable for precise work.
🎓 Discover one of the best Quality Assurance courses available — click below to explore the course that’s shaping future QA skills.

