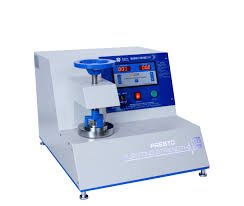
SOP for Calibration of Bursting Strength Tester.
Standard Operating Procedure (SOP)
1. Purpose
To describe the procedure for the calibration of the Bursting Strength Tester to ensure accurate and reliable results in determining the bursting strength of paper, paperboard, or fabric.
2. Scope
This SOP applies to all bursting strength testing instruments used in [insert department/lab/organization name].
3. Responsibility
-
Laboratory Technician/Analyst: Responsible for performing the calibration and recording the data.
-
Quality Control Manager: Responsible for reviewing calibration results and ensuring instruments are fit for use.
-
Quality Assurance (QA): Responsible for audit and compliance with calibration schedules.
4. Definitions
-
Bursting Strength Tester: A device that measures the pressure required to rupture a material using a rubber diaphragm and hydraulic or pneumatic pressure.
-
Calibration: The process of verifying that an instrument provides readings within an acceptable range against a known standard.
5. Equipment and Materials
-
Bursting Strength Tester
-
Certified Calibration Weights or Dead Weight Calibration Kit (traceable to national/international standards)
-
Calibration Certificate of the Weights
-
Calibration Log Sheet
-
Clean Cloth and Cleaning Solution (for maintenance)
6. Frequency of Calibration
-
Internal Calibration: Monthly
-
External Calibration: Annually (by certified third-party agency)
7. Procedure
7.1 Pre-Calibration Checks
-
Ensure the Bursting Strength Tester is clean and free from any previous sample residues.
-
Inspect the diaphragm and clamp area for wear or damage.
-
Verify that the hydraulic fluid level (if applicable) is sufficient.
-
Check that the instrument is leveled and securely placed.
7.2 Calibration Using Dead Weights
-
Power ON the instrument and allow it to stabilize (if digital).
-
Place the dead weight calibration device onto the tester’s diaphragm or designated platform.
-
Apply the certified weights incrementally (e.g., 5 kg, 10 kg, etc.) and note the corresponding pressure reading displayed by the machine.
-
Compare the reading on the instrument with the known values of the certified weights.
-
Record the difference between actual and measured values.
-
Repeat the process at multiple points across the measurement range (minimum 3 points — low, mid, high).
-
Remove the weights and ensure the tester returns to zero. If not, adjust zero settings if permitted.
7.3 Acceptable Tolerance Limits
-
Tolerance is typically ±1% of the applied load or as per manufacturer’s specifications.
-
If the instrument readings fall outside the tolerance, recalibration or maintenance is required.
8. Post-Calibration Steps
-
Document all calibration data, including:
-
Date
-
Calibration weight values
-
Instrument readings
-
Deviations
-
Adjustments made
-
-
Affix a calibration status label on the instrument (showing last calibration date, due date, and performed by).
-
If the instrument fails calibration:
-
Mark it “Out of Service”
-
Inform QA and initiate maintenance or third-party recalibration
-
9. Documentation and Records
Maintain the following:
-
Calibration log sheet
-
Calibration certificate (for weights used)
-
Calibration graph or deviation report (if applicable)
-
Corrective action records (if deviations were found)
10. Safety Precautions
-
Handle heavy weights with care to avoid injury.
-
Ensure hands and tools are clean to avoid slippage.
-
Do not exceed the instrument’s maximum load capacity.
11. References
-
Manufacturer’s Calibration Guidelines for Bursting Strength Tester
-
ISO 2758: Paper – Determination of bursting strength
-
ASTM D3786 (for textiles) or ASTM D774 (for paper) – Bursting strength test method
-
Internal Quality Manual.
🎓 Discover one of the best Quality Assurance courses available — click below to explore the course that’s shaping future QA skills.