Entry to and Exit from Microbiology testing area and Sterility testing area.
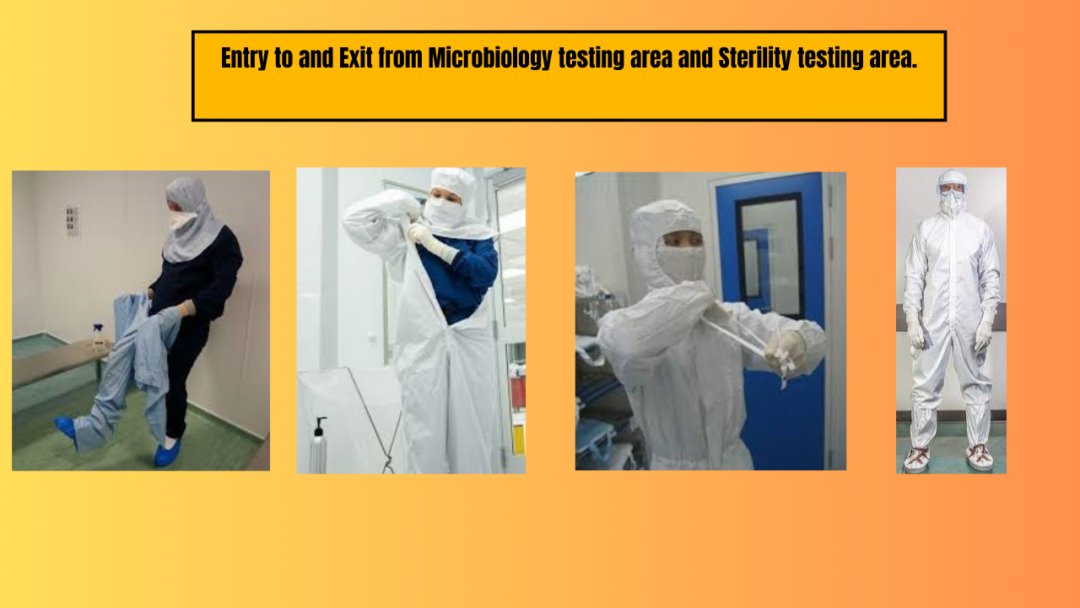
Entry to and Exit from the Microbiology testing area and Sterility testing area.
- Title: Aseptic Entry and Exit Procedure for Microbiology and Sterility Testing Areas
- Purpose: To provide step-by-step instructions for proper aseptic gowning and entry/exit procedures into the Microbiology and sterility testing areas to prevent contamination.
- Scope: This SOP applies to all personnel entering or exiting the following areas:
– Microbiology Testing Area
– Sterility Testing Area
- Responsibilities:
– All microbiologists must strictly follow this procedure
– The Head of Department is responsible for ensuring compliance with this SOP
- Procedure:
- Ensure the air handling unit for the microbiology testing area and sterility test area have been switched on before entering.
- Entry to and Exit from Microbiology Testing Area
- Press the ‘push’ button on the door frame of Change Room 1 when the green light is on. Push open the door.
- Wear shoe covers, cross over the bench, and enter to Change Room 2.
- Use the hand disinfectant to sanitize your hands.
- Put on the hood to completely cover your hair, then wear the long apron, tucking the hood neatly inside the apron.
- Wear safety goggles and cross over the bench.
- Put on sterile gloves and disinfect your hands again using the hand disinfectant. Press the ‘push’ button and enter in to Testing Room when the green light is on / shows the GO indicator.
- After completing your work, exit the testing area by pressing the ‘push’ button and pulling the door open when the green light is on.
- Cross over the bench, remove gloves, and discard them in the waste bin. Remove goggles and place them in the goggle bin after sanitization.
- Enter Change Room 2 by crossing over the bench. Remove the apron and hood and place them in the used dress bin for washing.
- Remove shoe covers and discard them in the waste bin.
- Enter into Exit Room 1 by pressing the ‘push’ button and pulling the door open when the green light is on / shown the GO indicator.
- Entry to and Exit from Sterility Testing Area
- Remove your watch, rings, and any other ornaments before entering into sterility test area.
- Enter Change Room 1, remove your lab apron and street clothes (except undergarments), and place them on the shelf. Also, remove your shoes and place them under the shelf.
- Wear shoe covers, cross over the bench, and enter Change Room 2.
- Follow the primary gowning procedure as in the microbiology area, but instead of a hood, wear a cap to cover your hair. Put on sterile gloves.
- Enter Change Room 3 by pressing the ‘push’ button and pushing the door open when the green light is on / shown the GO indicator. Sanitize your hands with disinfectant.
- Take and wear clean primary garments (Shirt and pant) from bottom rack of garment cubicle.
- Open the sterile dress cabinet, wear the hood by tying the laces behind your head, covering your nose, mouth, and hair completely. Adjust the space for your eyes to have a comfortable vision.
- Wear the sterile gown, taking care not to let it touch the floor or walls. Tuck the hood neatly inside the gown and pull the gloves over the gown sleeves.
- Wear sterile booties on both feet and put on safety goggles.
- Wear a second pair of sterile gloves over the first pair and sanitize your hands.
- Check in the mirror to ensure your gowning is proper.
- Check that the hood is covering your hair, nose, and face properly and is tucked inside the gown.
- Check that the gloves are stretched over the gown sleeves correctly.
- Check that the booties are tied properly over your legs.
- Enter the room by pressing the ‘push’ button with your elbow and pushing the door open when the green light is on / shown GO indicator.
- Enter the sterility Testing area by using your elbows to open the door.
- Disinfect your hands with 70% isopropyl alcohol (IPA) or the specified disinfectant before starting the sterility test.
- Use your elbow to ‘Autoclave unloading area’ for unloading media from the autoclave and accessing the pass box for accessories and samples.
- After completing the sterility test, exit Room by pressing the ‘push’ button and pulling the door open when the green light is on / shown GO indicator.
- Exit into the airlock Room by pressing the ‘push’ button and pulling the door open when the green light is on / shown GO indicator.
- Remove gloves and discard them in the waste bin. Remove goggles and place them in the used goggle bin.
- Remove the hood, gown, and booties, and place them in the used dress bin for washing.
- Enter into Exit Room by pressing the ‘push’ button and pulling the door open when the green light is on / shown GO indicator.
- In Change room, remove the primary gowning apparel and place it in the used dress bin for washing. Remove shoe covers and discard them in the waste bin.
- Wear your street clothes, cap, and lab apron, and exit by pressing the ‘push’ button and pulling the door open when the green light is on / shown GO indicator.
- Visitors are allowed inside the controlled area only when assisted by trained and authorized personnel.